Imagine launching a complex project without a plan. It's like trying to build a spaceship with a vague sketch instead of a detailed blueprint. You might have all the right parts, but without a step-by-step guide, you're headed for chaos, missed connections, and costly errors. This is precisely why a comprehensive project manager checklist is not just a helpful tool but an essential framework for success. It transforms ambiguity into a clear, actionable roadmap, ensuring that no critical detail is overlooked from kickoff to final delivery.
A well-structured checklist serves as your single source of truth, guiding you through every project phase with precision. Think of it less like a simple to-do list and more like a recipe for a successful outcome. It systematically builds a foundation for predictable results, manages stakeholder expectations, and helps you navigate the inevitable challenges that arise. Different industries often adapt these frameworks to their specific needs; for instance, you can find detailed templates like these Smartsheet project manager checklists for highly regulated fields.
In this guide, we'll walk you through the eight non-negotiable items that belong on every project manager's master checklist. From defining the initial scope to managing the final budget, these steps form a repeatable blueprint that will help you steer any project from a state of potential chaos to one of controlled, successful completion.
1. Project Charter and Scope Definition
Every successful project begins with a clear, shared understanding of its purpose and boundaries. This is where the Project Charter and Scope Definition come in; they are the foundational documents in any effective project manager checklist. The project charter is the official birth certificate of your project. It formally authorizes the project, granting you, the manager, the authority to apply resources to project activities. It outlines the why, what, and who at a high level.
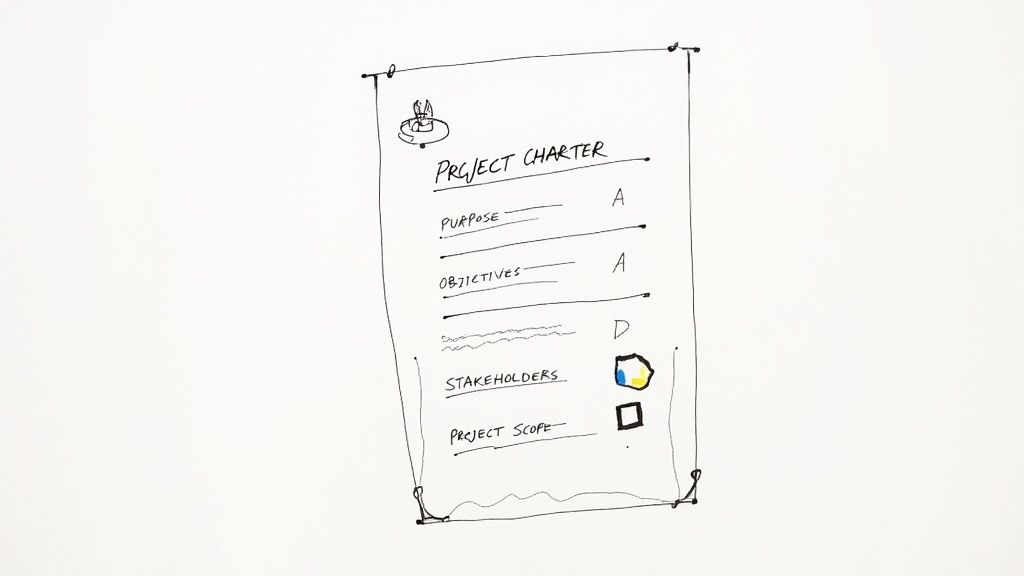
Scope definition, a critical part of the charter, then details the specific project outcomes and the work required to deliver them. Crucially, it also defines what is out of scope, preventing the dreaded "scope creep" where extra features and requests slowly derail timelines and budgets. This first step is non-negotiable. Without a solid charter, a project is like a ship leaving port without a destination or a map—it’s just drifting.
Why This is Essential
A well-defined charter and scope serve as the project's "North Star." It aligns everyone, from your team to executive sponsors, on a single vision. This clarity prevents misunderstandings, provides a framework for decision-making, and establishes the criteria for measuring success. For example, when a company decided to launch a new mobile banking app, the charter clearly stated the goal was "to allow users to check balances and transfer funds." This prevented the team from getting sidetracked by feature requests like loan applications or investment tools, which were explicitly listed as "out of scope" for version one.
How to Implement It Effectively
Follow these practical steps to create a powerful project charter and scope definition:
- Involve Key Stakeholders: Get the project sponsor, key clients, and team leads in a room (virtual or physical) to draft the charter together. Their early input ensures everyone feels ownership and understands the goals from the start.
- Use SMART Objectives: Define objectives that are Specific, Measurable, Achievable, Relevant, and Time-bound. Instead of a vague goal like "Improve user satisfaction," aim for something concrete: "Increase the app's user satisfaction score by 15% within six months of launch."
- Document Exclusions Explicitly: Be crystal clear about what the project will not deliver. If you're building a new website, you might state, "This project includes the design and launch of the main website, but a mobile app and e-commerce integration are out of scope for this phase." This manages expectations and prevents future arguments.
- Keep It Concise and Accessible: A charter should be a high-level guide, not an exhaustive 50-page plan. Aim for 1-2 pages that are easy for anyone to read and reference quickly.
- Define Success Metrics: How will you know you've won? Include clear, measurable criteria like "Reduce customer support call volume by 20%" or "Achieve 10,000 active users within the first year."
2. Stakeholder Identification and Communication Plan
No project exists in a bubble. Its success hinges on effectively engaging with every person, group, or department that has a stake in the outcome. This is where Stakeholder Identification and a robust Communication Plan become indispensable parts of your project manager checklist. The process starts with a simple question: "Who will be affected by this project, and who can influence its success?" You map out everyone involved, from the CEO to the end-user, and then strategically plan how and when to communicate with them.
A well-crafted plan defines who needs what information, how often they need it, and the best way to deliver it. It transforms communication from an afterthought into a strategic function that builds trust, manages expectations, and secures crucial support. Skipping this step is a classic mistake that leads to teams feeling out of the loop, executives feeling surprised by problems, and the entire project suffering from misalignment.
Why This is Essential
A systematic approach to stakeholder management prevents critical misunderstandings and ensures everyone is pulling in the same direction. It helps you anticipate potential roadblocks, gather valuable feedback, and maintain the support needed to navigate challenges. Imagine a hospital implementing a new electronic health record system. The stakeholders aren't just doctors and nurses; they include IT staff, billing departments, receptionists, and even patients. A great communication plan would ensure each group gets tailored updates—technical specs for IT, workflow changes for nurses, and privacy updates for patients—preventing chaos and resistance.
How to Implement It Effectively
Follow these practical steps to develop a powerful stakeholder and communication plan:
- Map Stakeholders Early: Create a simple grid. On one axis, plot their level of influence (high/low). On the other, plot their level of interest (high/low). This helps you prioritize. The high-influence, high-interest folks (like your project sponsor) need to be managed closely.
- Tailor Your Communication: Don't send a mass email blast to everyone. Your CEO might just want a one-page dashboard once a month, while your development team needs a 15-minute daily stand-up meeting. Match the message, channel, and frequency to each group's specific needs.
- Create a Communication Matrix: Document your plan in a simple table. Columns should include: Stakeholder Name/Group, Information Needed (e.g., status reports, risk alerts), Frequency (daily, weekly, monthly), Channel (email, meeting, Slack), and Owner (who is responsible for sending it).
- Schedule Regular Touchpoints: Be proactive. Schedule recurring check-ins with your key stakeholders. This keeps them engaged, gives them a chance to provide feedback, and prevents you from having to deliver bad news out of the blue.
- Document and Address Concerns: Keep a simple log of stakeholder feedback and concerns. More importantly, document how each issue was addressed. This builds incredible trust and shows people their input is valued.
3. Work Breakdown Structure (WBS) and Task Dependencies
Once you know the what (your scope), the next critical step in a project manager checklist is to break it down into smaller, more manageable pieces. The Work Breakdown Structure (WBS) is a tool that does exactly this. It's a hierarchical decomposition of the total project, like an organizational chart for the work itself. It dissects a complex project into controllable components, allowing for accurate estimation, scheduling, and assignment.
Paired with the WBS, identifying task dependencies is crucial. This process maps out the logical relationships between activities, clarifying which tasks must finish before others can start (e.g., you can't paint the walls before they are built). This vital link between the what (WBS) and the when (schedule) prevents bottlenecks and illuminates the project's critical path, ensuring a logical and efficient workflow.
Why This is Essential
The WBS acts as a bridge between the high-level project charter and the detailed project plan, providing clarity and preventing work from being overlooked. It ensures the entire team understands their specific responsibilities within the larger project. Think about building a house. The WBS would break it down from "House" to major phases like "Foundation," "Framing," and "Finishing." "Framing" would then be broken down into smaller work packages like "Build first-floor walls," "Install floor joists," and "Install roof trusses." This clarity prevents anyone from trying to install windows before the walls are up.
How to Implement It Effectively
Follow these practical steps to create a robust WBS and map dependencies:
- Decompose from the Top Down: Start with the main project deliverables from your scope document. Break them down into major phases, then into smaller sub-deliverables, and finally into individual "work packages"—the lowest level of the WBS.
- Use the 8/80 Rule: As a rule of thumb, a work package should require between 8 and 80 hours of effort. This makes it large enough to be meaningful but small enough to be easily managed and estimated without excessive micromanagement.
- Involve the Experts: Don't create the WBS in isolation. Collaborate with the team members who will actually do the work. A developer will know all the small-but-critical steps needed for a software feature that you might miss.
- Follow the 100% Rule: The sum of all the work at the lower levels must equal 100% of the work defined by the level above it. This simple rule ensures nothing is missed and no extra, out-of-scope work is added.
- Use a WBS Dictionary: For each work package, create a brief description of what's included, who is responsible, and what "done" looks like. This avoids confusion later.
- Map Dependencies Clearly: Identify the relationships between tasks. Most are "Finish-to-Start" (Task A must finish before Task B can start), but others exist. Using a project management tool can help you visualize these connections in a Gantt chart.
4. Resource Planning and Allocation
A project is only as strong as the resources behind it. Resource planning and allocation is the systematic process of identifying, securing, and managing the people, equipment, and money needed to get the job done. It’s about getting the right people with the right skills and the right tools in the right place at the right time.
This step moves beyond simply making a list of what you need; it involves strategically assigning those resources to tasks to optimize efficiency and prevent bottlenecks. Without a solid resource plan, teams face burnout from being assigned to too many tasks at once, projects stall while waiting for a critical specialist to become available, and budgets spiral out of control. It's a cornerstone of any functional project manager checklist.
Why This is Essential
Effective resource management is the engine of project execution. It prevents the common pitfall of having a great plan with no one available to deliver it. By visualizing who is working on what and when, you can proactively spot conflicts and address shortages. For example, a marketing agency might have three projects that all need their top graphic designer in the same week. A resource plan would highlight this clash ahead of time, allowing the project managers to re-sequence tasks or bring in a freelancer before a crisis hits.
How to Implement It Effectively
Follow these practical steps to master resource planning and allocation:
- Create a Resource Management Plan: Start by documenting how you will estimate, acquire, manage, and control all project resources. This plan should define roles and responsibilities clearly.
- Visualize Allocation: Use tools like a resource calendar or a Gantt chart to see who is working on what and when. This visual aid makes it easy to spot if someone is scheduled for 16 hours of work in an 8-hour day.
- Consider Skills, Not Just Names: When assigning tasks, think beyond just who is available. Match the specific skills and experience levels required for a task to the right team member. Don't assign a complex coding task to a junior developer just because they're free.
- Track Utilization Rates: Regularly compare your planned resource usage against their actual time spent. This helps you understand if your initial estimates were accurate and provides valuable data for planning future projects.
- Use Specialized Software: For projects with any complexity, tracking resources in a spreadsheet quickly becomes a nightmare. It's wise to explore the best resource management tools to automate allocation, tracking, and reporting, saving you from administrative headaches.
5. Risk Management and Mitigation Planning
No project is immune to surprises. Risk management is the proactive process of identifying, analyzing, and responding to potential problems and opportunities that could affect your project. It's about looking into the future, asking "What could go wrong?" and "What could go right?" and then making a plan. This crucial step in any project manager checklist involves creating a living document, the risk register, to track and plan for these uncertainties.
This process isn't about eliminating all risks—that's impossible. Instead, it's about understanding the probability and potential impact of each risk, allowing you to prioritize your focus and resources effectively. A solid risk plan ensures you have a strategy in place before something bad happens, preventing a minor issue from escalating into a project-derailing crisis.
Why This is Essential
Effective risk management is the difference between being prepared and being caught off guard. It provides a structured way to handle uncertainty, improves stakeholder confidence, and increases the likelihood of achieving project goals on time and within budget. For example, a construction project in a coastal city would identify "hurricane season" as a major risk. Their mitigation plan might include purchasing weather-resistant materials, building extra buffer time into the schedule, and having an emergency shutdown procedure ready. This forethought saves millions in potential damages and delays.
How to Implement It Effectively
Follow these practical steps to build a robust risk management plan for your project:
- Hold a Risk Brainstorming Session: Gather your team and key stakeholders and ask them to brainstorm anything that could possibly go wrong. Use categories like Technical, External, Organizational, and Project Management to guide the conversation.
- Create a Risk Register: Use a simple spreadsheet to document each risk. Include columns for: Risk Description, Potential Impact, Probability (High/Medium/Low), Response Plan, and Risk Owner (who is responsible for watching it).
- Prioritize Ruthlessly: You can't focus on everything. Score each risk by multiplying its probability and impact (e.g., on a scale of 1-5). This gives you a score that helps you focus on the top 5-10 risks that pose the biggest threat.
- Plan Your Response (The 4 Ts): For each significant risk, decide on a strategy: Tolerate (accept it and take no action), Treat (take action to reduce its likelihood or impact), Transfer (shift the risk to a third party, like buying insurance), or Terminate (change the plan to eliminate the risk entirely).
- Monitor and Review Continuously: Your risk register is not a "set it and forget it" document. Review it in your weekly team meetings. Ask, "Have any new risks emerged? Have any old risks changed?" Developing these skills is part of a broader strategy, and you can learn more about managing project timelines and risks here.
- Identify Opportunities, Too: Don't forget to look for positive risks (opportunities). A new technology might become available that could speed up your project, or a key competitor might stumble. Plan how to take advantage of these positive events.
6. Schedule Development and Milestone Tracking
Once you know what needs to be done, the next critical question is when. This is where schedule development and milestone tracking enter the project manager checklist. This process involves creating a detailed timeline that sequences all the tasks from your Work Breakdown Structure, estimates how long they will take, and assigns resources to them. It’s the roadmap that translates your project plan into a time-bound, operational guide.

Milestone tracking complements the schedule by highlighting significant checkpoints, like the completion of a major phase or a key deliverable. Milestones are like signposts on a long highway trip; they confirm you're on the right track and making good progress. A well-constructed schedule doesn’t just dictate deadlines; it provides a logical framework for execution and control, ensuring every team member knows what to do and by when.
Why This is Essential
A realistic and detailed schedule is the backbone of project execution. It provides a baseline for tracking progress, managing resources, and identifying potential delays before they become critical. It helps set realistic stakeholder expectations and prevents team burnout from impossible deadlines. Think of a movie production. The schedule is meticulously planned down to the day, coordinating actors, locations, and special effects teams. A delay in one scene can have a domino effect on the entire production, so tracking against milestones like "Principal Photography Complete" is crucial for keeping the massive project on track.
How to Implement It Effectively
Follow these practical steps to create and manage a robust project schedule:
- Build from the WBS: Use the work packages from your Work Breakdown Structure as the list of tasks for your schedule. This creates a direct and traceable link between your defined scope and your timeline.
- Use Three-Point Estimation: For complex or uncertain tasks, ask your team for three estimates: Optimistic (best-case), Most Likely, and Pessimistic (worst-case). Averaging these provides a more realistic duration than a single guess.
- Identify the Critical Path: This is the longest sequence of dependent tasks that determines the project's total duration. Any delay to a task on the critical path will directly delay the entire project. You need to protect these tasks above all others.
- Set Meaningful Milestones: Place milestones at natural decision points or the completion of major phases, such as "User Interface Design Approved" or "Prototype Ready for Testing." These are powerful tools for communicating progress to stakeholders without overwhelming them with details.
- Track Progress Consistently: Don't just create the schedule and forget about it. In your weekly meetings, update the status of each task. Is it on track, at risk, or delayed? This allows you to spot problems early. To master this, you can learn more about effective time management schedules.
7. Budget Management and Cost Control
A project can meet every objective on time, but if it goes wildly over budget, it can still be considered a failure. This is why disciplined Budget Management and Cost Control are non-negotiable items on any project manager checklist. This process involves estimating costs, securing funding, and meticulously tracking every dollar spent to ensure the project delivers its value within its financial constraints.
Effective cost control isn't just about watching numbers in a spreadsheet; it's about active management. It means spotting financial variances early, understanding why they happened, and taking decisive action to get back on track. Without this financial rigor, a project's viability is constantly at risk. Just think of a home renovation—what starts as a $50,000 project can easily balloon to $80,000 without strict tracking and a process for approving changes.
Why This is Essential
Robust budget management is the financial backbone of your project. It provides a clear baseline for measuring financial performance and ensures that resources are allocated efficiently. This process fosters accountability and gives stakeholders confidence that their investment is being managed responsibly. For large government projects, like building a new bridge, budget tracking is often public and scrutinized. Using techniques like Earned Value Management (EVM) is critical to show taxpayers that their money is being spent wisely and that the project is delivering the value it promised for the cost incurred.
How to Implement It Effectively
Follow these practical steps to maintain tight control over your project's finances:
- Use Bottom-Up Estimating: The most accurate way to build a budget is to start from the bottom. Use your Work Breakdown Structure (WBS) to estimate the cost (labor and materials) for each individual task. Then, roll these costs up to get a detailed total.
- Include a Contingency Reserve: No project goes perfectly. Allocate a contingency reserve, often 10-20% of the total budget, to cover unforeseen issues or risks that materialize. This buffer is a planned part of your budget, not a secret slush fund.
- Implement Earned Value Management (EVM): For larger projects, EVM is a powerful technique. It integrates your scope, schedule, and cost performance into a single view. Key metrics like the Cost Performance Index (CPI) give you an early warning if you are getting less value than you are spending.
- Track Commitments, Not Just Invoices: Don't wait for a bill to arrive to track an expense. As soon as you sign a contract or issue a purchase order, record it as a "committed cost." This gives you a real-time picture of your financial obligations.
- Conduct Regular Budget Reviews: Schedule weekly or bi-weekly meetings to review actual spending against the budget. Is there a variance? Why? Regularly forecast the final project cost to see if you are still on track and make adjustments as needed.
- Establish a Formal Change Control Process: Ensure that any change that impacts the budget (like a new feature request) goes through a formal approval process. This prevents unauthorized spending and clearly documents the financial impact of every scope change.
8. Quality Management and Deliverable Acceptance
Ensuring a project delivers what it promised is the essence of quality management. This process involves systematically planning, assuring, and controlling activities to guarantee that all deliverables meet the specified requirements and stakeholder expectations. It isn't just a final inspection at the end; quality is something you build into the project throughout its entire lifecycle.
Deliverable acceptance is the critical final step where completed work is formally checked against pre-defined criteria. This isn't a casual nod of approval; it's a structured process that provides objective proof that the work is done correctly. This triggers the formal closure of a project phase or the final handover to the client. Neglecting this part of the project manager checklist can lead to endless arguments, constant rework, and a project that never truly feels finished.
Why This is Essential
A proactive approach to quality focuses on preventing defects rather than just finding them later. This saves an immense amount of time and money by reducing rework and fixing issues when they are cheapest to address (early on). It builds stakeholder confidence and protects the reputation of your team and organization. For example, a software company that relies on peer code reviews and automated testing throughout development (quality assurance) will have far fewer bugs to fix after launch than a company that just does a quick test at the very end.
How to Implement It Effectively
Follow these practical steps to integrate robust quality management and a clear acceptance process:
- Define Acceptance Criteria Early: During the planning phase, work with your stakeholders to define what "done" looks like for each major deliverable. These criteria should be clear, measurable, and testable. For more guidance, you can explore detailed information about crafting effective acceptance criteria for user stories.
- Involve Quality Experts from the Start: Don't wait until the testing phase to bring in your quality assurance (QA) team. Involve them in planning to help define quality standards and build quality checks directly into the project schedule.
- Use Quality Gates: Implement formal checkpoints or "quality gates" where a deliverable must pass specific criteria before the project can move to the next phase. For example, a design deliverable might need formal approval before any development work can begin.
- Track Quality Metrics: Monitor key performance indicators (KPIs) like the number of defects found, the amount of rework required, or customer satisfaction scores. Use this data to spot trends and continuously improve your processes.
- Formalize the Sign-Off: Never rely on a verbal "looks good." Create a formal acceptance document or use a project management tool to capture written sign-offs from the authorized stakeholders for every major deliverable. This creates an official record and prevents future misunderstandings.
Project Manager Checklist Comparison Table
Bringing It All Together: Your Blueprint for Action
Trying to run a project without a structured approach is like navigating a maze blindfolded. You might eventually find your way out, but the process will be inefficient, stressful, and full of unnecessary wrong turns. The comprehensive project manager checklist detailed in this article serves as your map and compass, transforming potential chaos into a clear, manageable, and repeatable process for success.
We’ve walked through the eight critical pillars that form the foundation of any well-managed project. From the initial idea captured in the Project Charter to the final sign-off in Deliverable Acceptance, each step is a building block for the next. You learned to define a rock-solid scope, identify and engage key stakeholders, and break down complex work into manageable tasks using a WBS. We explored how to strategically plan resources, anticipate and mitigate risks, and create a realistic schedule with clear milestones. Mastering budget control and ensuring quality are not afterthoughts; they are continuous processes woven into the fabric of your project from day one.
From Checklist to Dynamic Framework
The true power of this checklist isn't in just ticking boxes. It's in its ability to transform your role from a reactive firefighter to a proactive, strategic leader. Think of it as a dynamic framework, not a static to-do list.
- Proactive vs. Reactive: A robust risk register allows you to anticipate issues instead of constantly being surprised by them.
- Clarity vs. Ambiguity: A well-defined scope and WBS eliminate confusion and prevent scope creep before it starts.
- Alignment vs. Disconnection: Your stakeholder communication plan ensures everyone is informed, engaged, and working towards the same goal.
Adopting this systematic approach builds confidence within your team and trust with your stakeholders. It shows that you are in control, have a clear vision, and are equipped to handle the inevitable challenges that arise.
Your Next Step: Implementation and Tools
The most effective way to implement this framework is by leveraging technology that consolidates these elements into a single source of truth. Manually juggling spreadsheets, documents, and emails for each of these eight areas is a recipe for administrative overload. This is why it's so important to compare project management tools to find a platform that centralizes your charters, risk logs, schedules, and budgets. The right software acts as a central nervous system for your project, automating tracking and freeing you up to focus on what truly matters: leading your team and delivering exceptional value. This checklist is your blueprint; the right tool is what helps you build the structure efficiently and effectively, turning your plan into a successful reality.
Ready to turn this blueprint into your daily reality? The Nora Template for Notion is designed to bring this entire project manager checklist to life in one integrated workspace. Stop juggling scattered documents and start managing your projects with clarity and control. Explore the Nora Template today and build your next success story.
.svg)